
How to Create Food Blog with Blogger & activate Adsense to earn money
Start earning with Food Blogging. Create your Food Blog along with your youtube channel and earn through Google Adsense & Youtube monetization..
Steps to create Food Blog
Step 1 – Go to Blogger.com and click Create your blog.

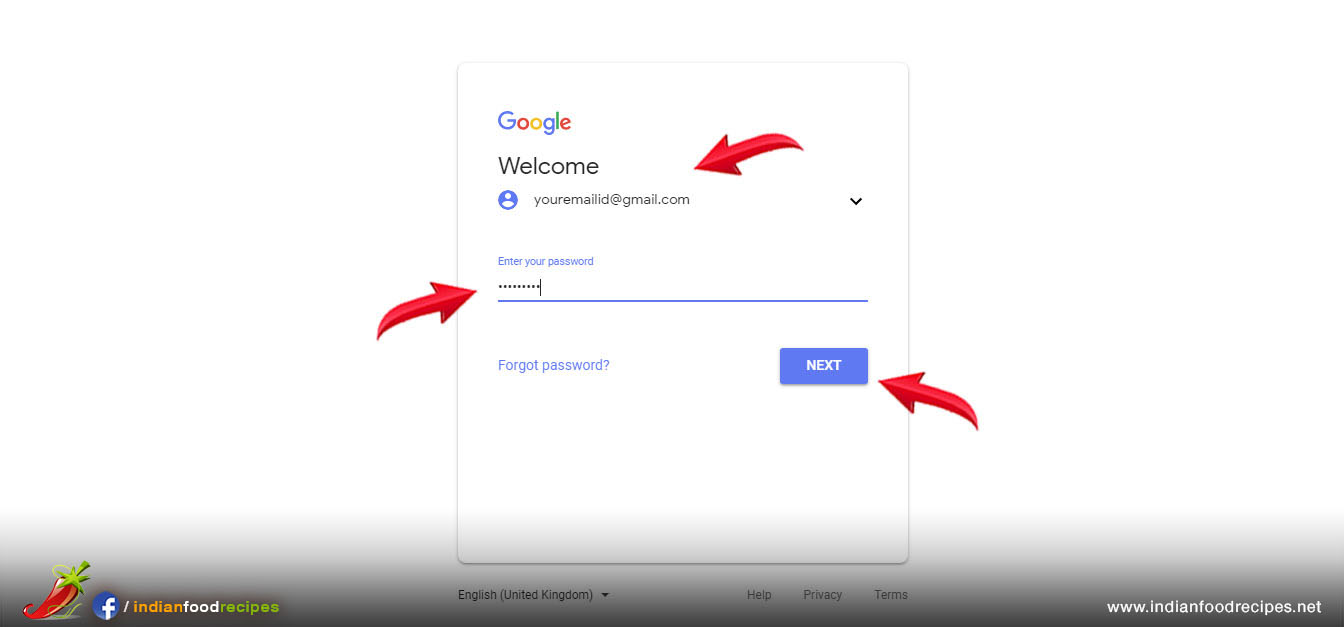
Step 2 – Login with your Gmail Account.
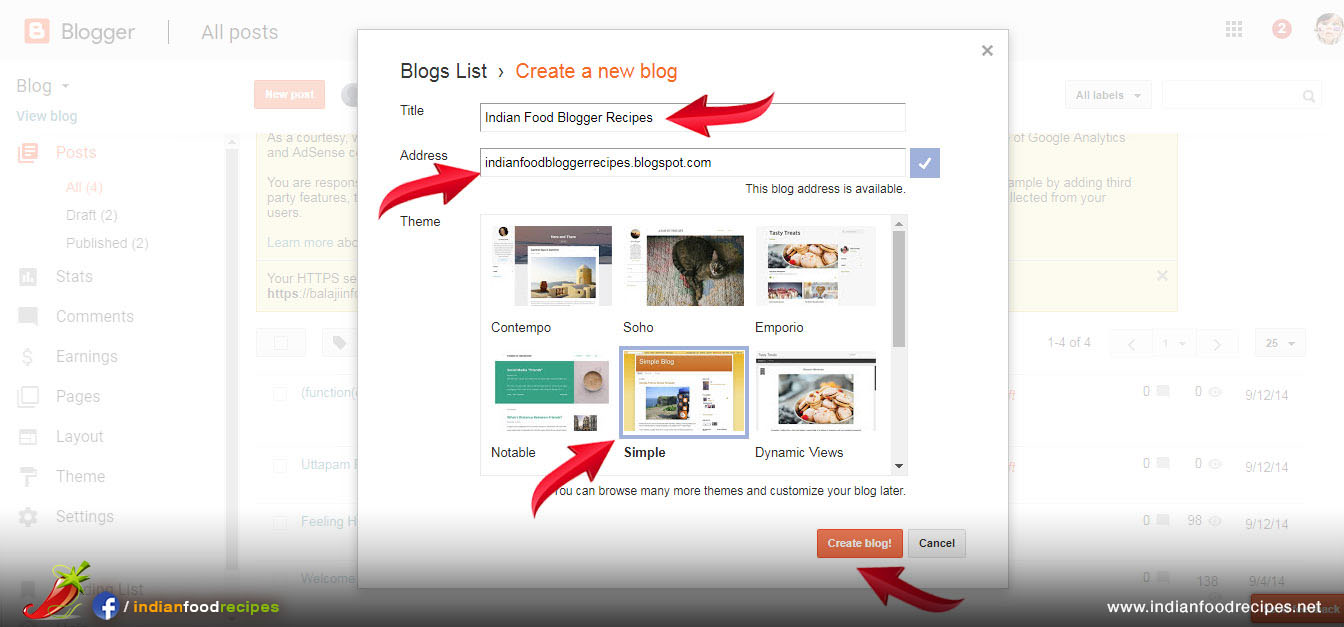
Step 3 – Create a New Blog. Type Title, Food Blog Address and Design Template and click Create Blog. Address will be your food blog URL Address which you can mention in your youtube video and facebook page.
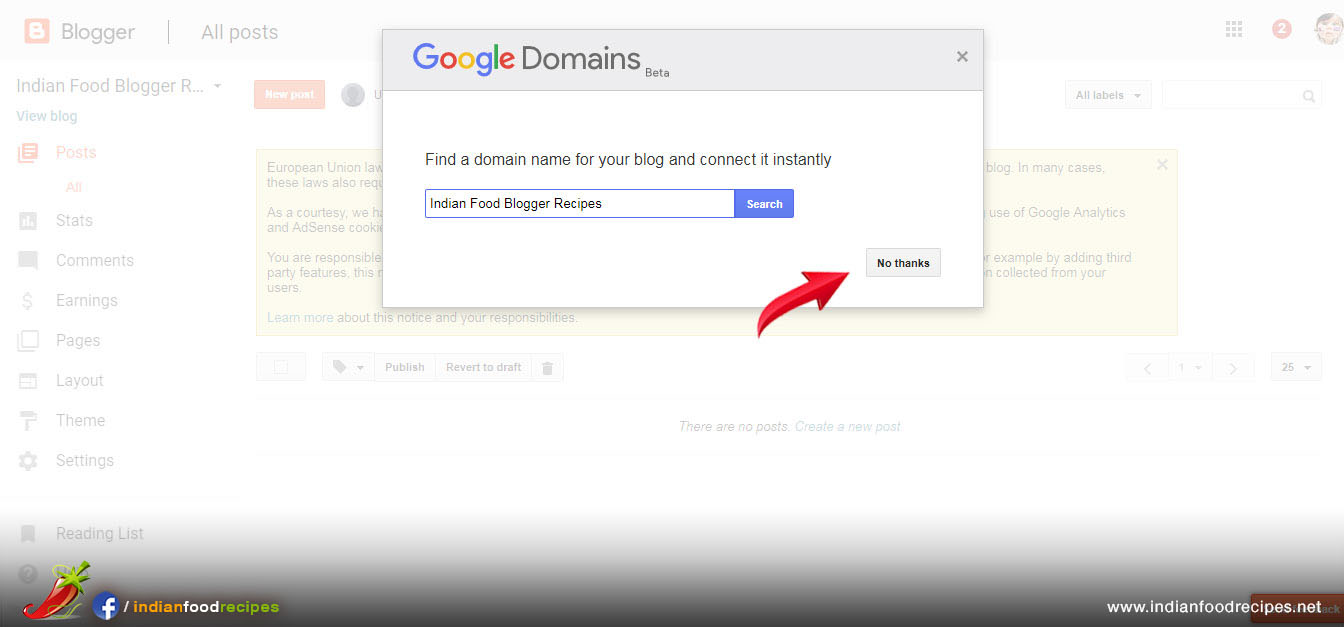
Step 4 – If it will ask to link Website Domain name then skip this step
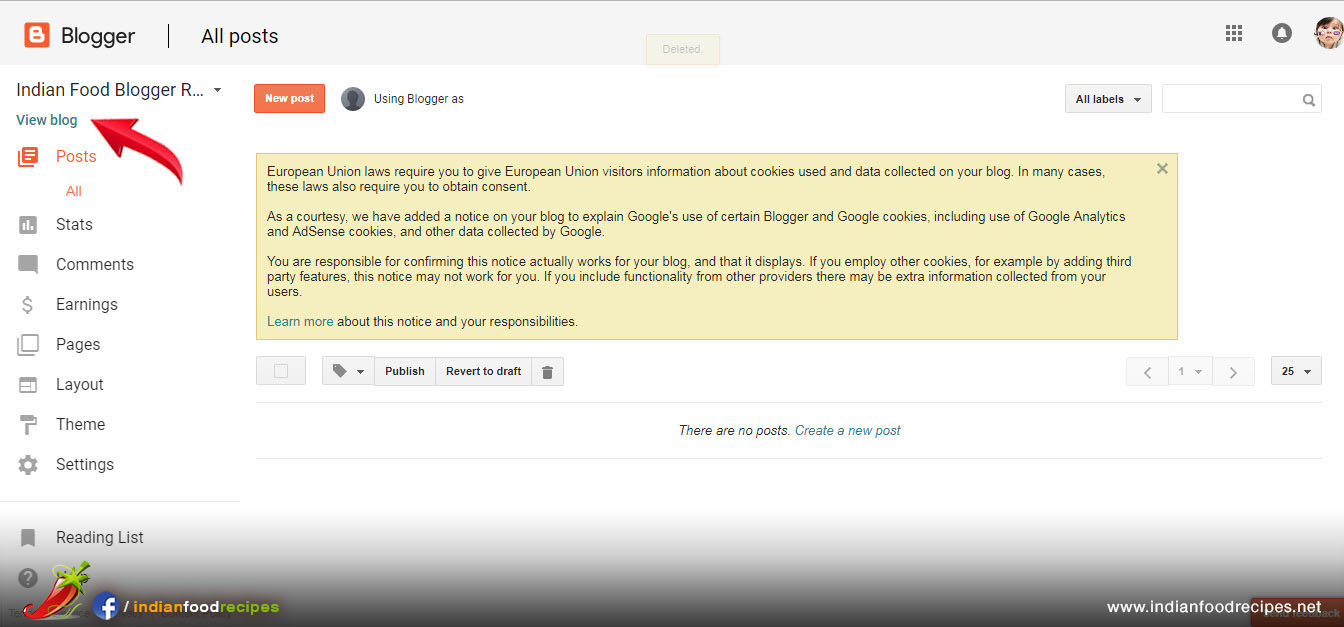
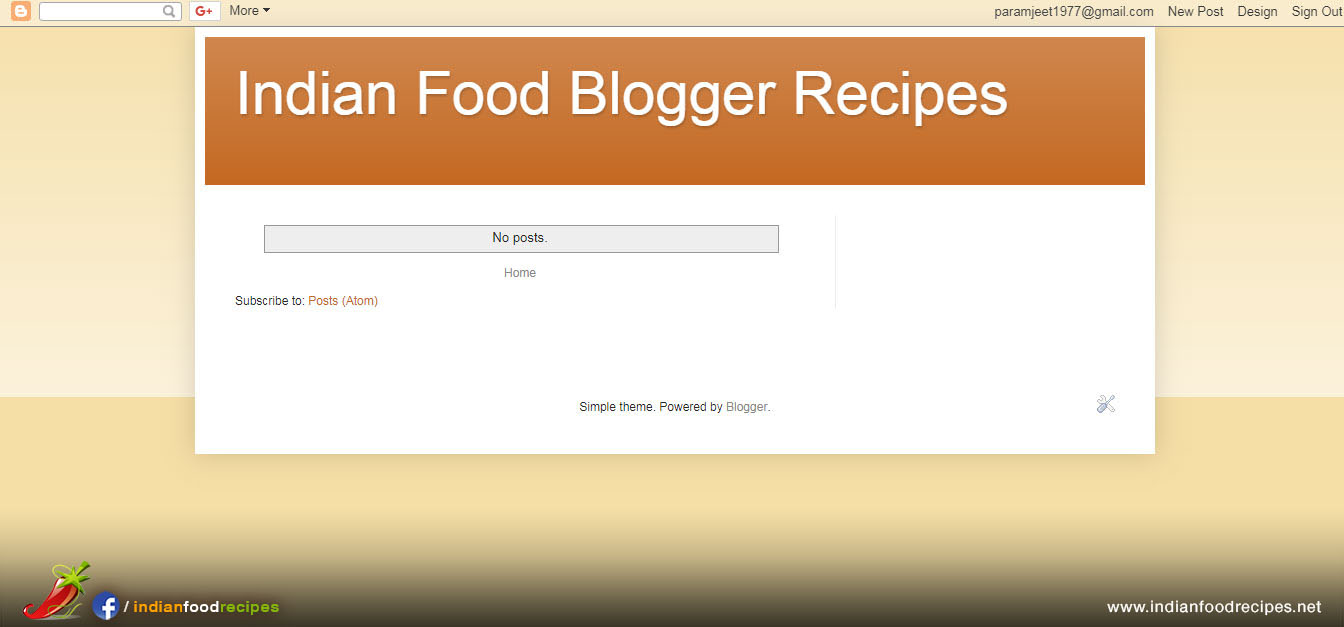
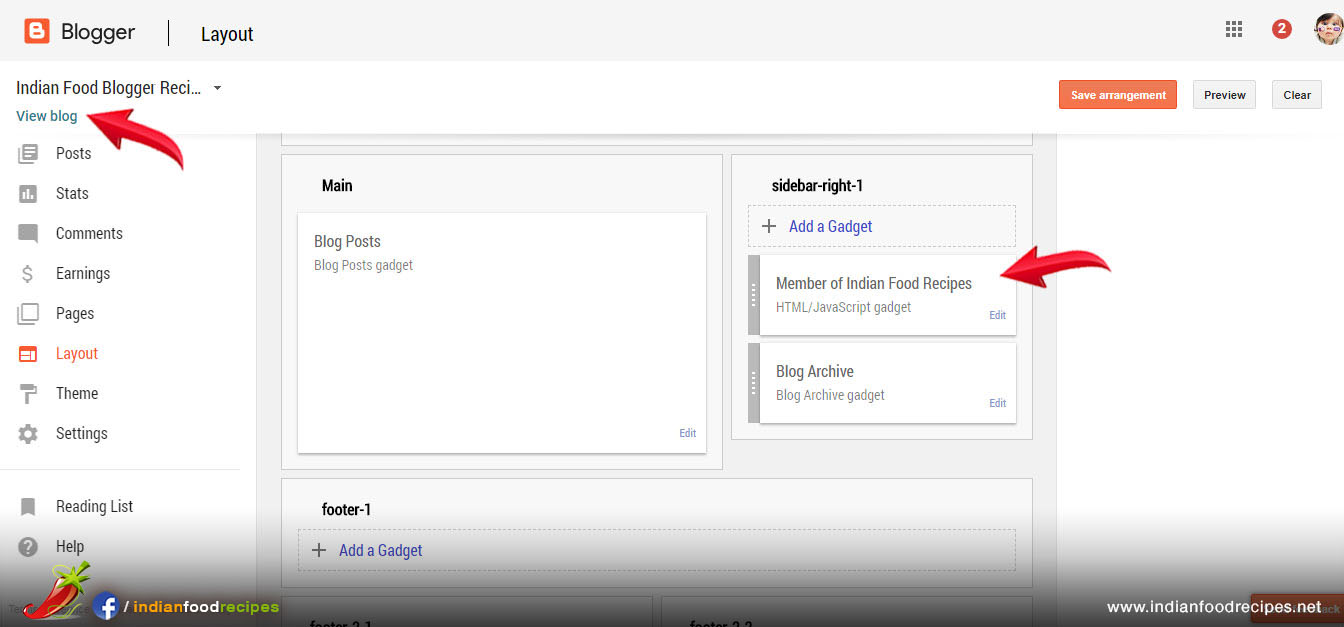
Step 5 – Click on “View Blog” to preview your food blog.
Step 6 – You will see preview of your food blog
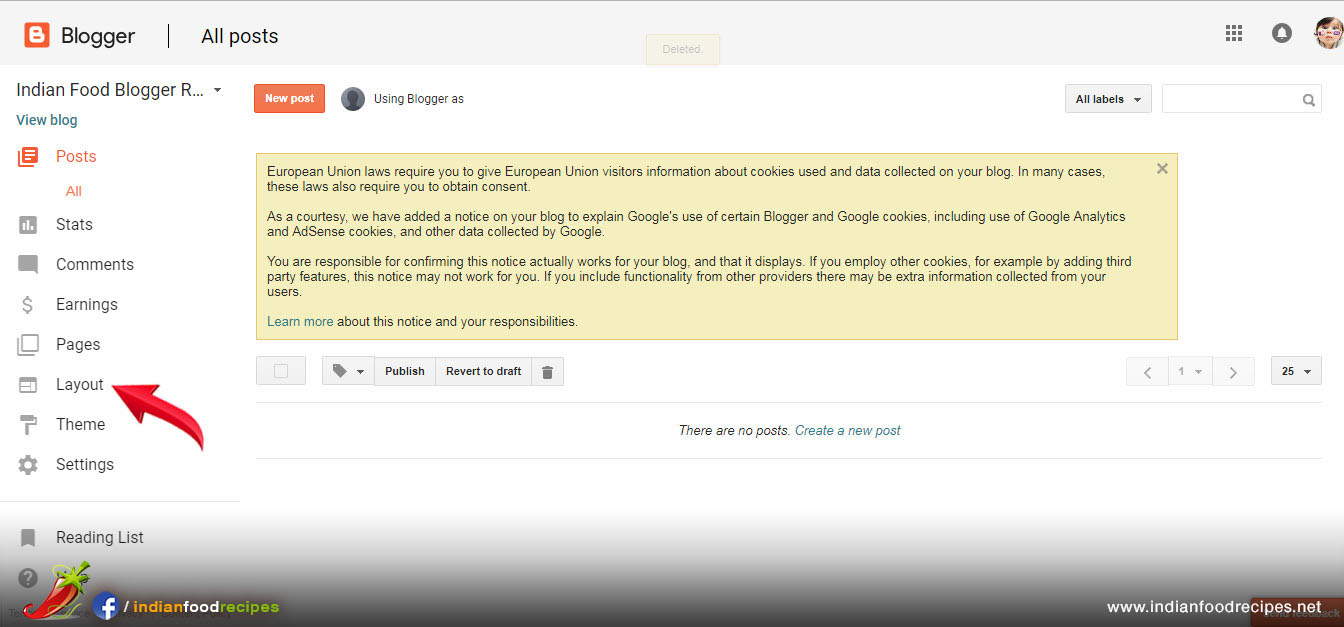
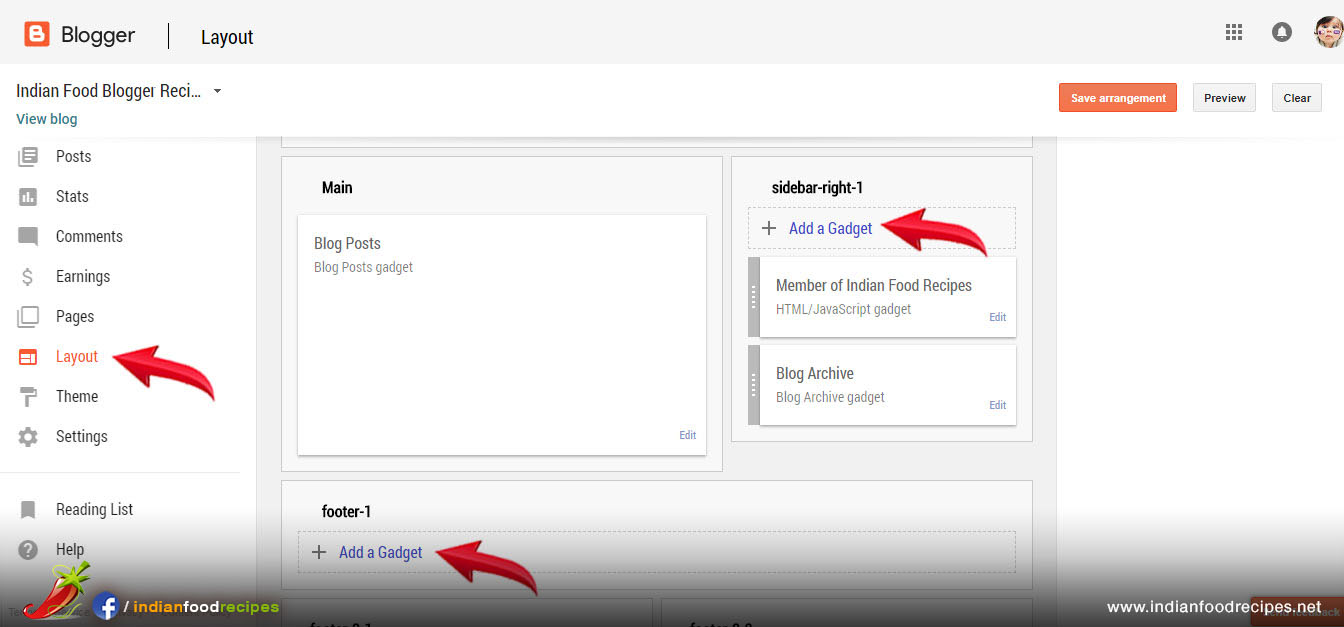
Step 7 – To add more features in food blog click on Layout.
Step 8 – You will see “Add a Gadget” at different places of your food blog. Click on “Add a Gadget” on Side Bar on right side.
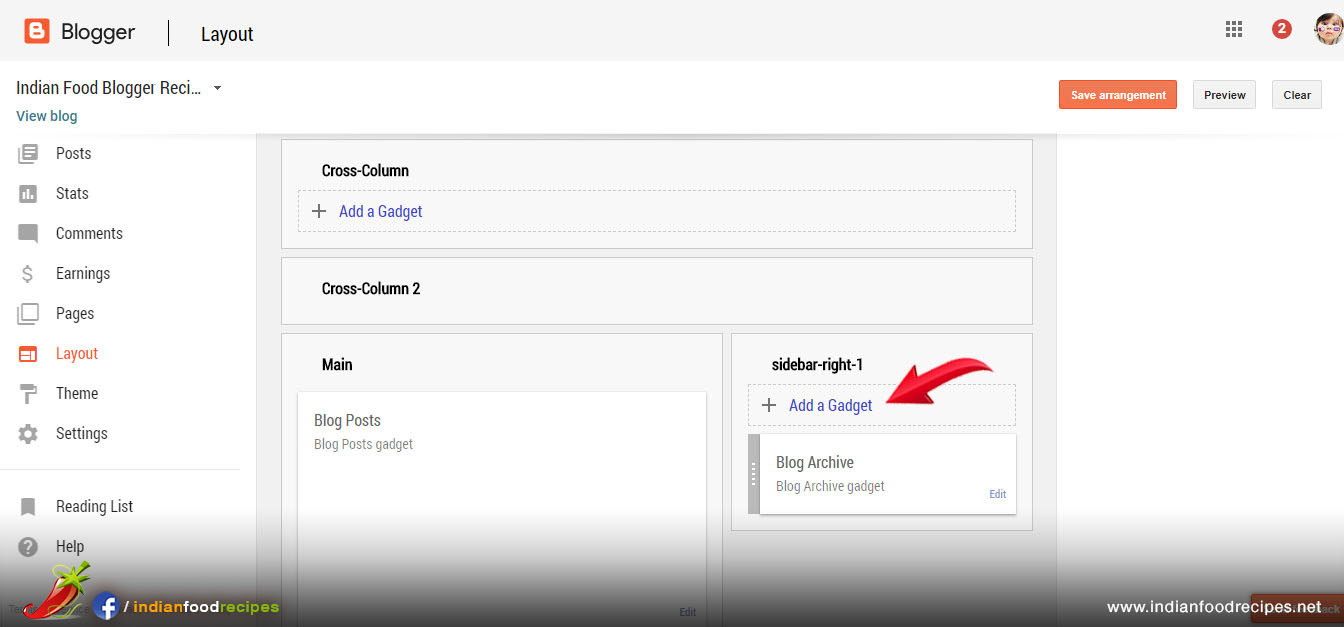
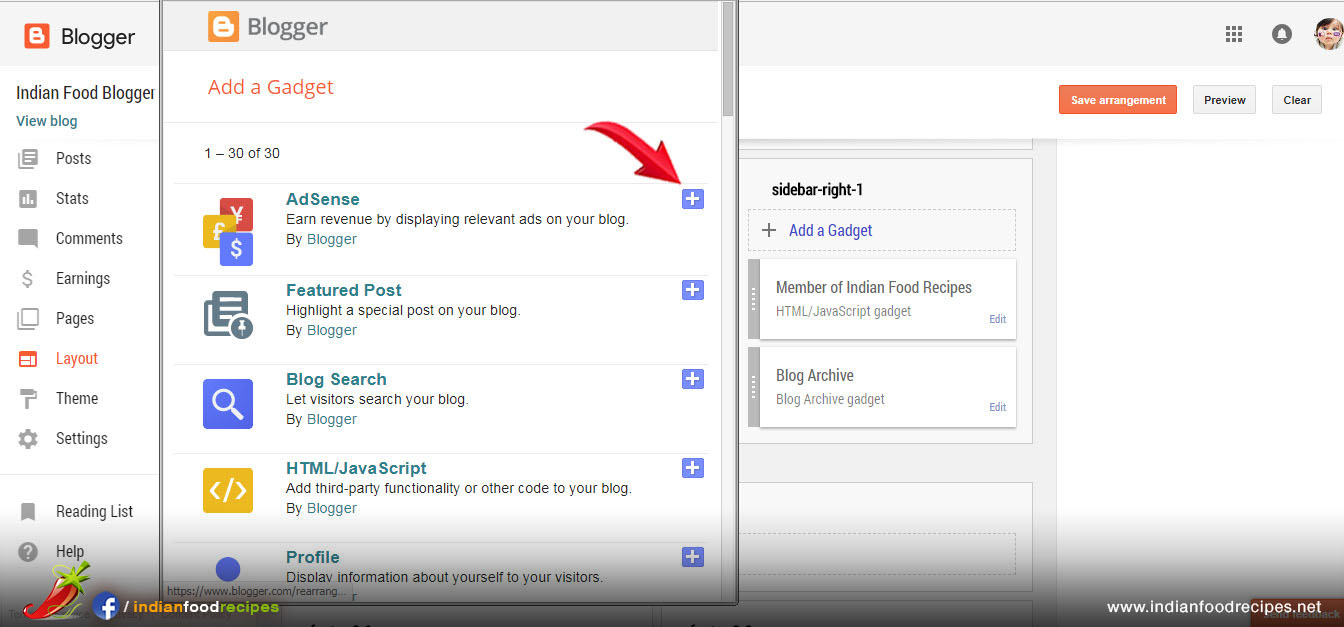
Step 9 – For Example : You wan to add Indian Food Recipes membership Badge in your food blog. You will see list of Features. Click on + icon next to HTML & Javascript Gadget.
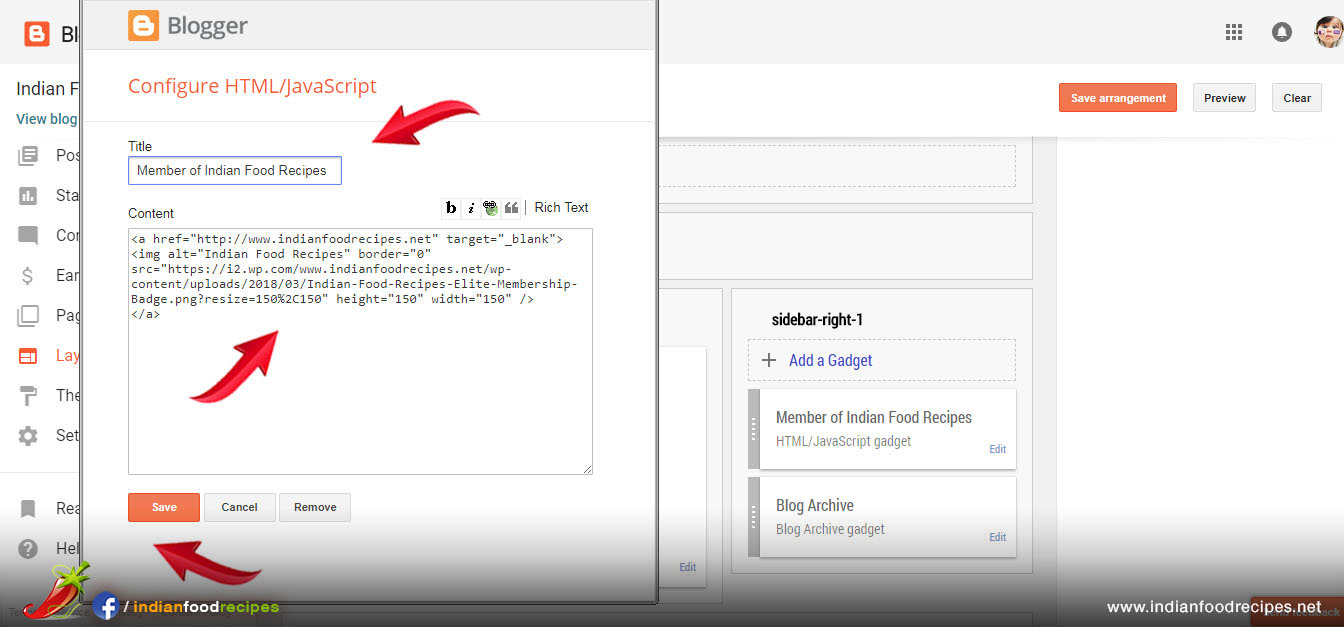
Step 10 – Type Gadget Title and Copy / Paste HTML Code and click Save.
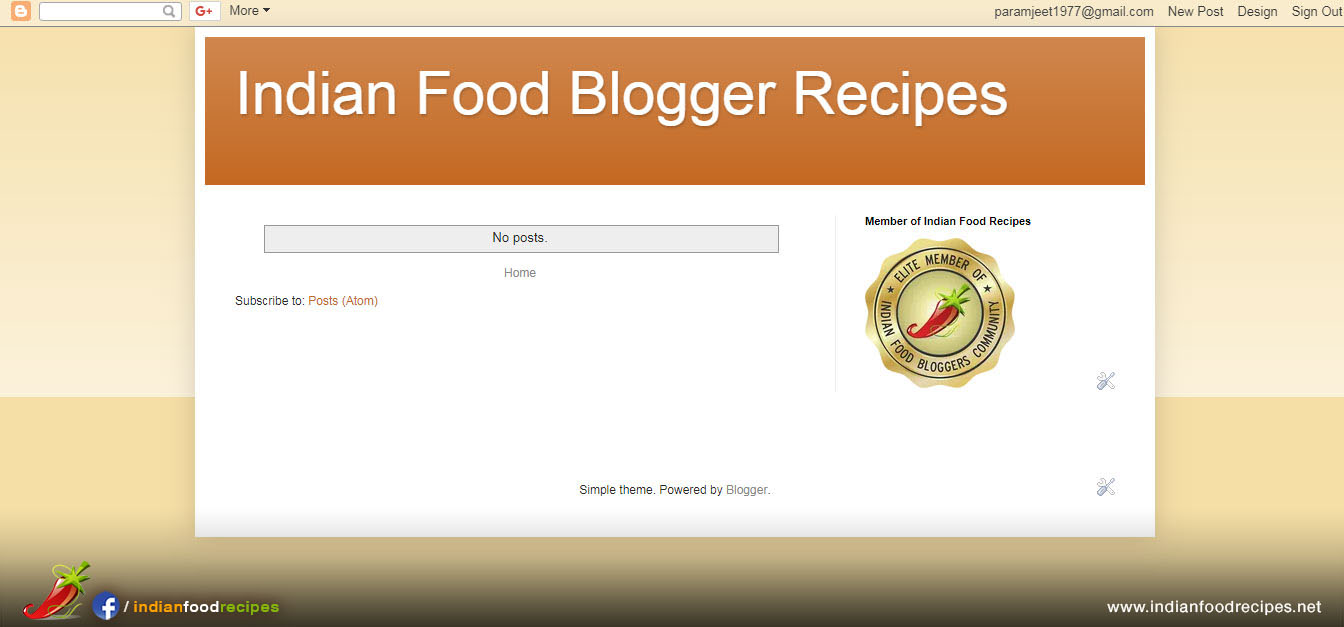
Step 11 – You will see “HTML Code” Gadget in your Food Blog on right side. Click on “View Blog” to see preview.
Step 12 – Your Food Blog will show Membership Badge in Page
Step 13 – Similarly you can add more Gadget Features in your food blog on different places. Click on Add a Gadget.
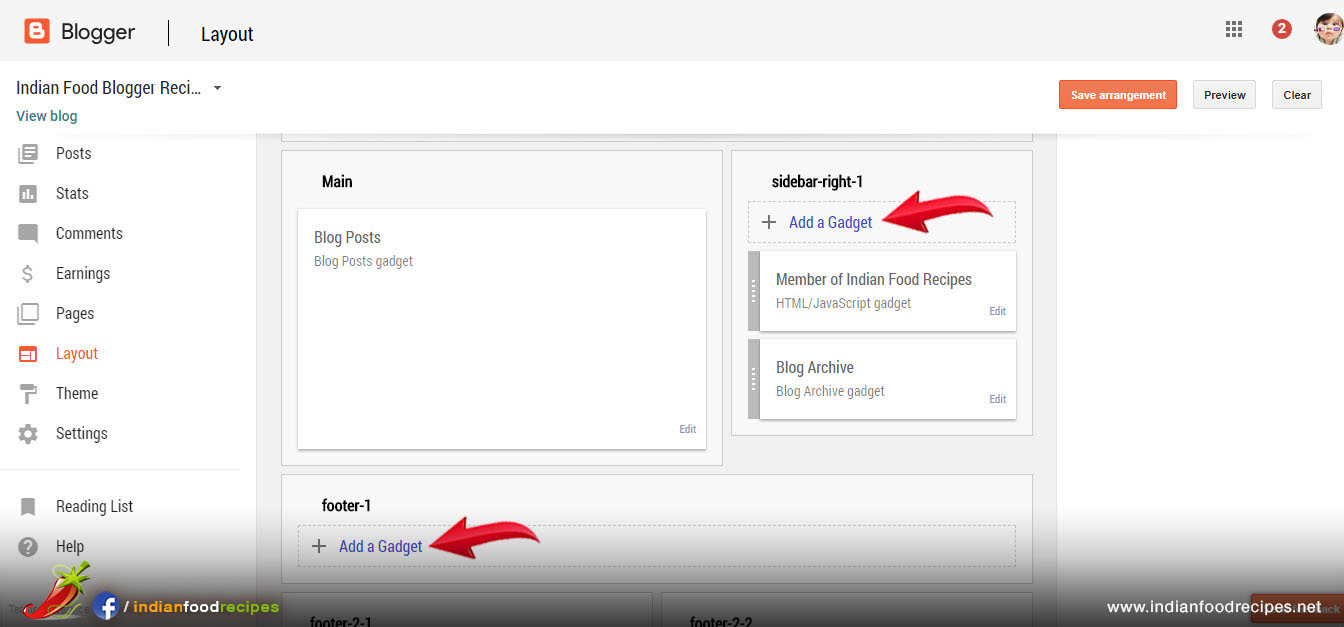
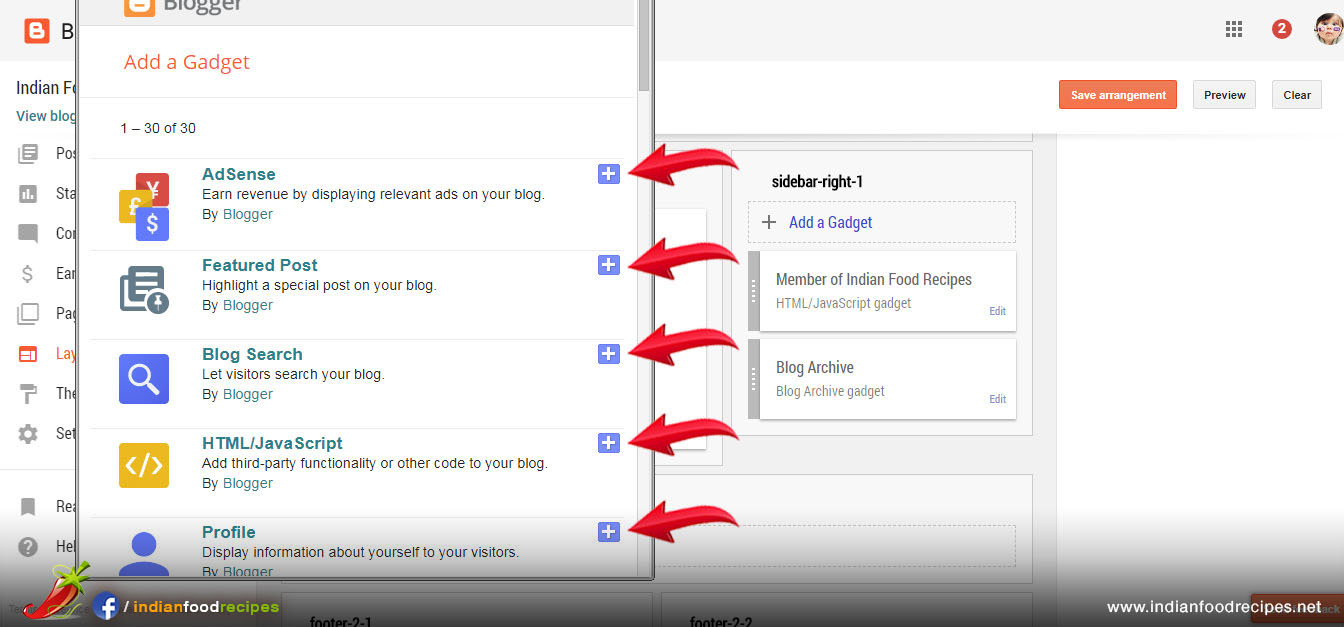
Step 14 – Select new feature from the list and add in your food blog by clicking + icon.
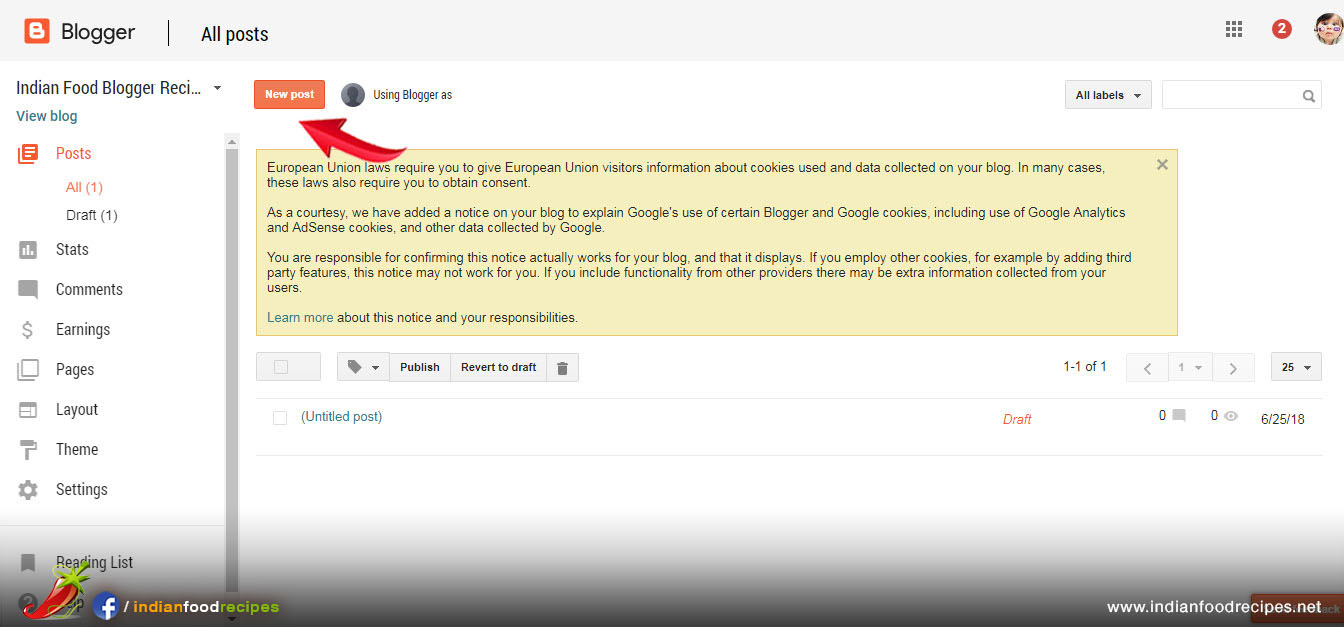
Step 15 – To create Recipe Page, click on Post on left side and then Click on New Post.
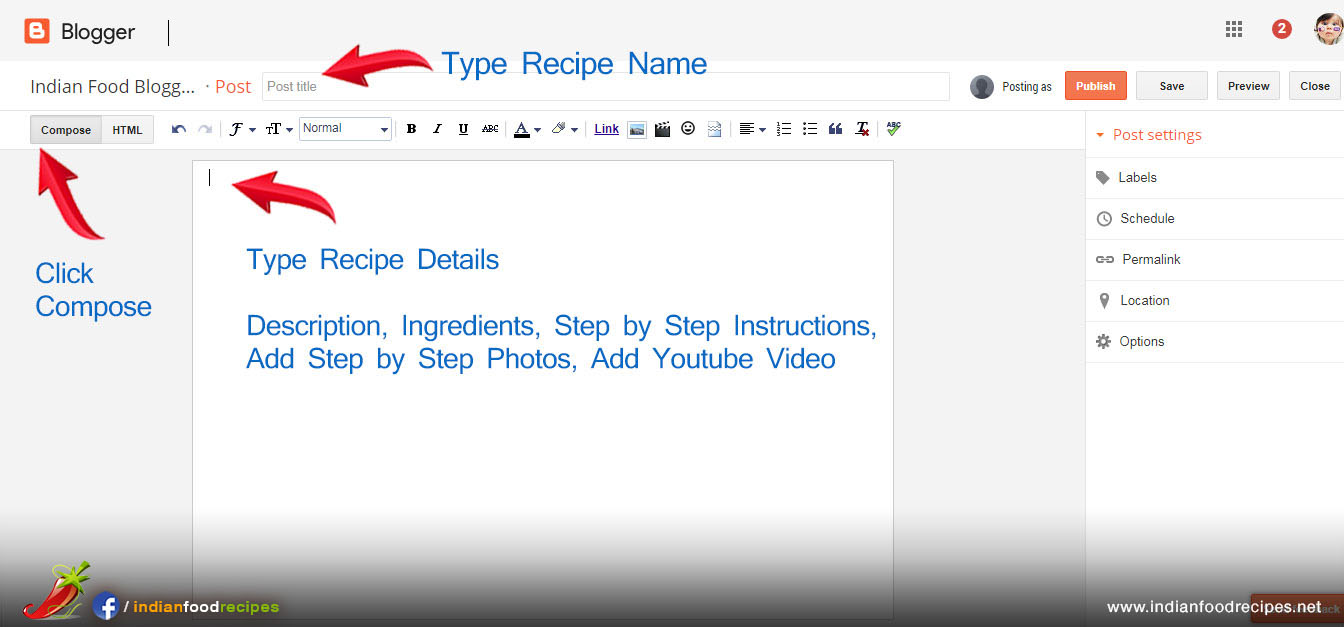
Step 16 – Click “Compose” on left side. Type Recipe Details including Recipe Title, Description and step by step instructions.
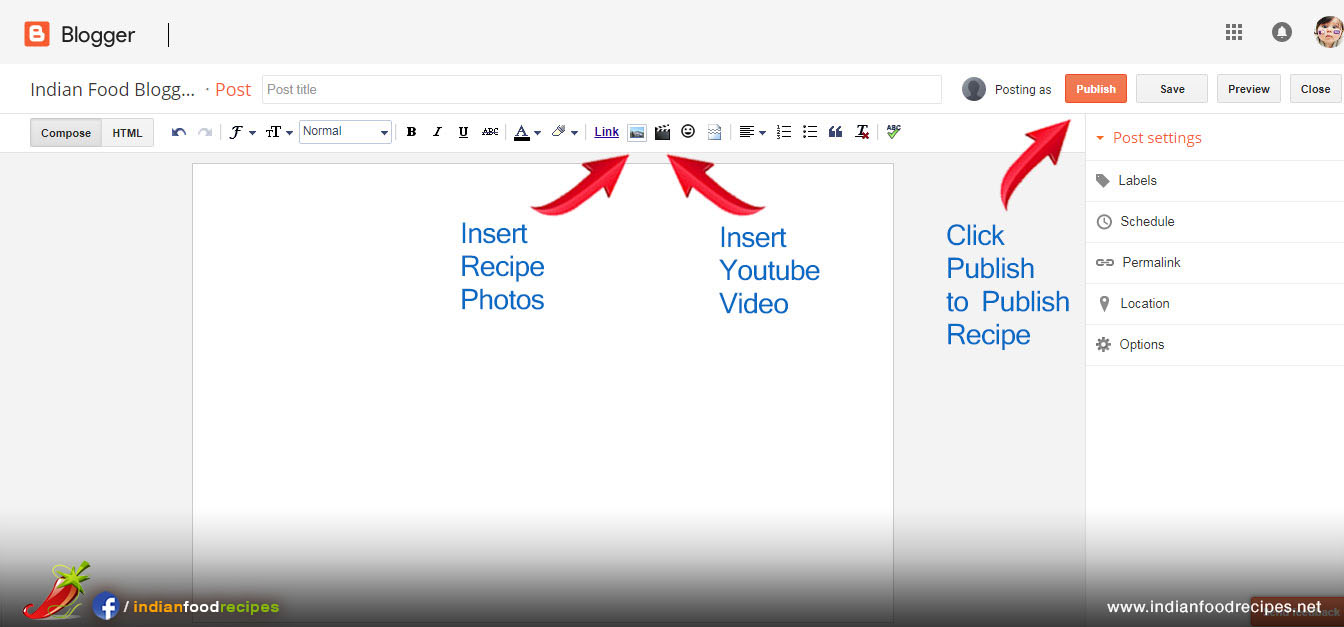
Step 17 – Click Image icon to insert step by step recipes photos. Click Video icon to insert Youtube Video in your food blog. Click Publish button to publish recipe in your food blog. (Note : Take screenshots of your youtube video to save recipe step by step photos)
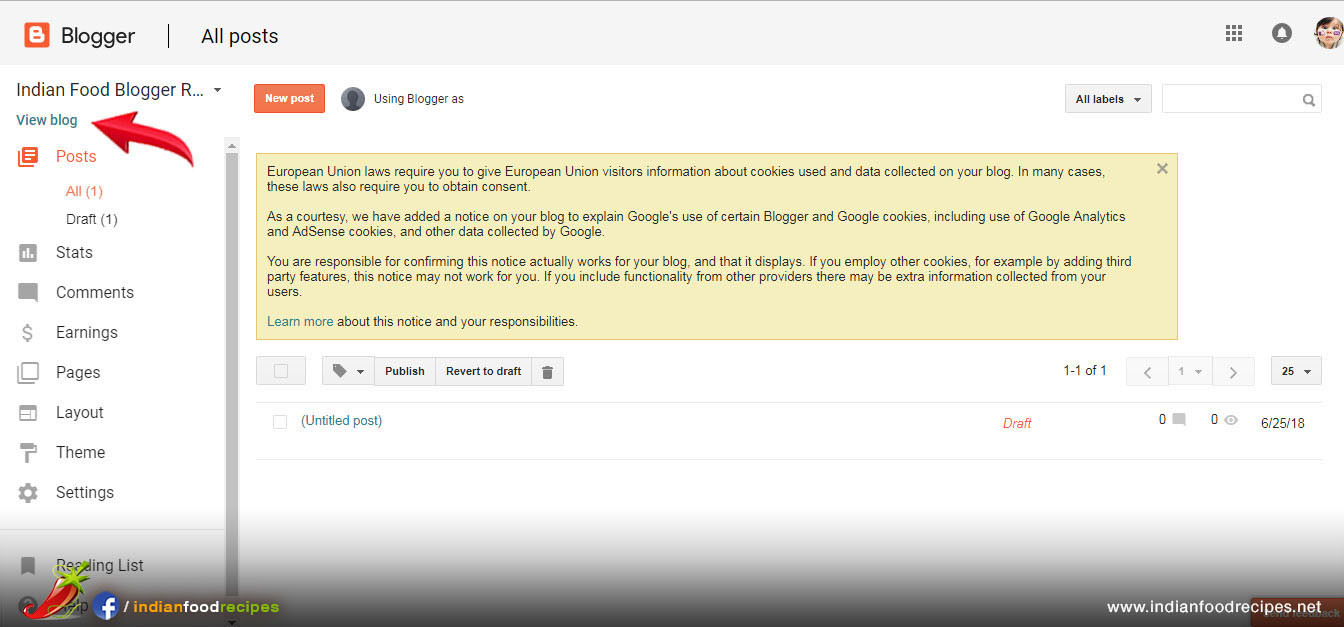
Step 18 – Click on View Blog to preview your Food Blog.
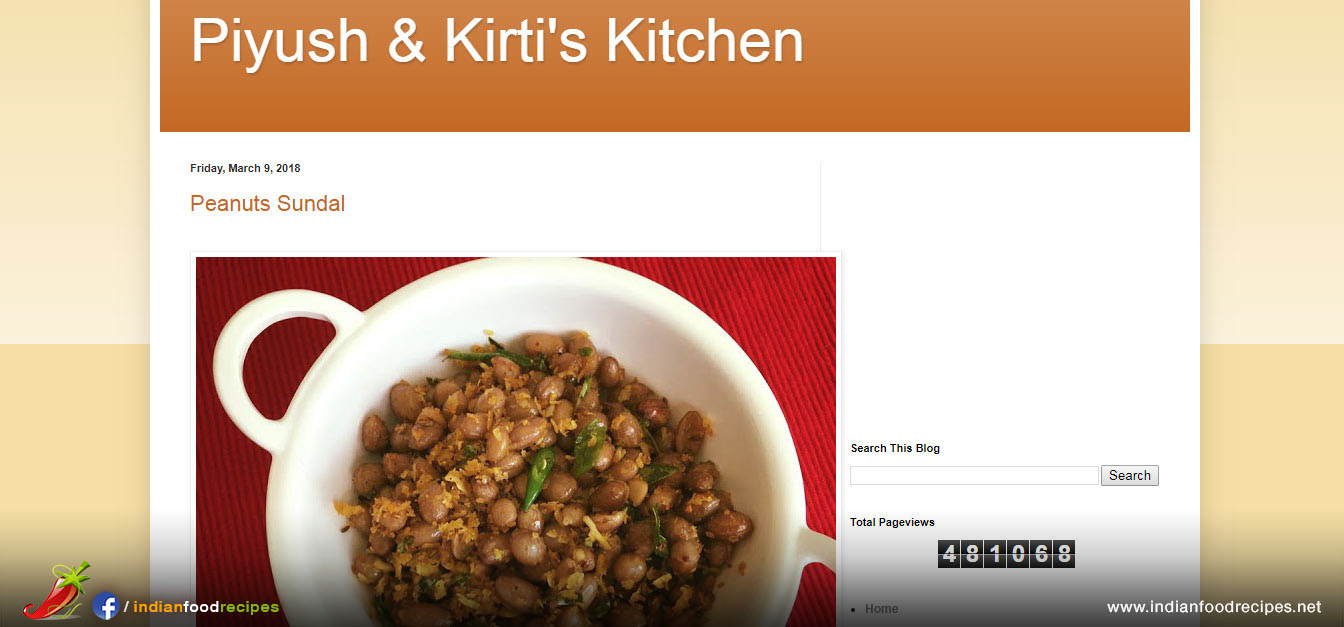
Step 19 – Step 19 – View Sample Food Blog with step by step recipes.
Click link >> http://piyushkirtikitchen.blogspot.com/
Step 20 – Publish at least 30 recipes in your food blog and then you can apply for Google Adsense. Google will review your food blog before giving your Adsense Code. Apply for Adsense by clicking on Earnings and follow step by step instructions
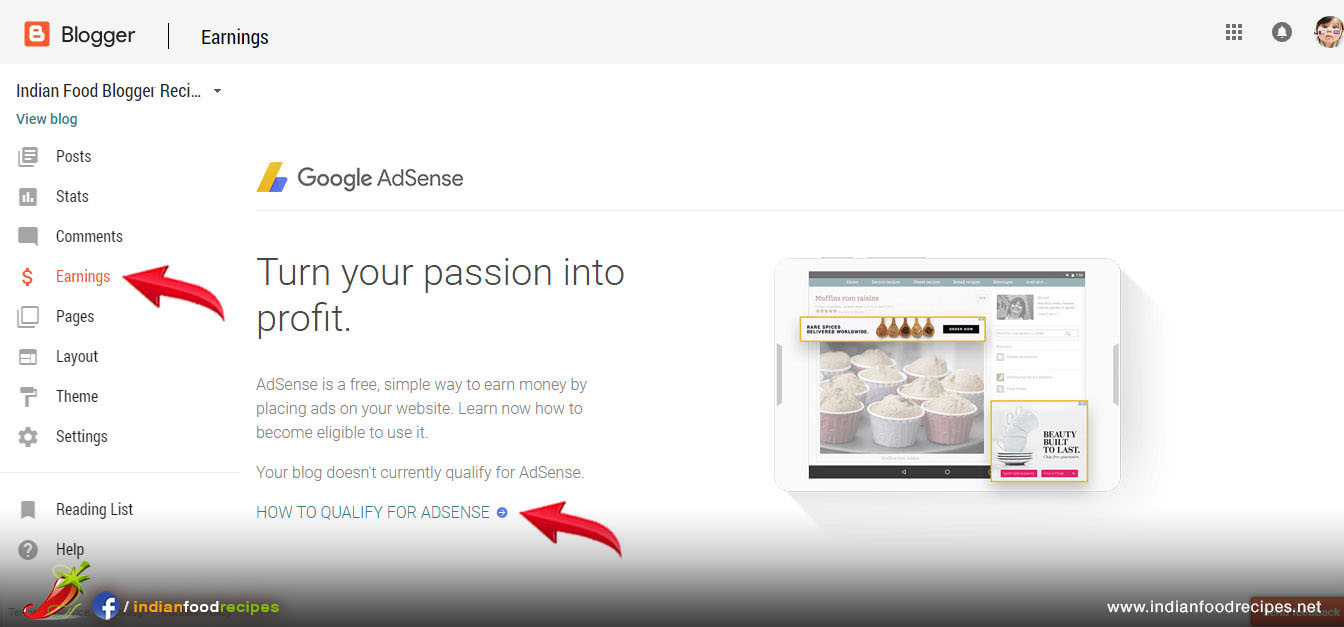
Step 21 – To Insert “Adsense Code” in your food blog. Click on Layout. Then Click on “Add Gadget”.
Step 22 – Click on + icon next to Adsense and follow instructions on screen.
Step 23 – Check Sample Food Blog with Google Adsense.
Click link >> http://bethicad.blogspot.com/
Now you can earn with Good Adsense with your food blog.
Membership Badge
- Join us, by adding Membership Badge in your Food Blog / Website.
- We will create your Profile in our website.
Elite Membership Badge
- Join us, by adding Membership Badge in your Food Blog / Website.
- We will create your Profile in our website.
- Get new audience traffic to your food blog through our Platform.
- Opportunity to work with Companies / brands.
- * Terms & Conditions applied ( Click here to read )